When using this program,Turn the "POWER SUPPLY CONT" switch on the back panel of JRL2000F to "ON".
JRL-2000F controller V3.1 (2024/04/15)
2024/04/15 Ver3.1 Added Yaesu Musen radio
When using this program,Turn the "POWER SUPPLY CONT" switch on
the back panel of JRL2000F to "ON".
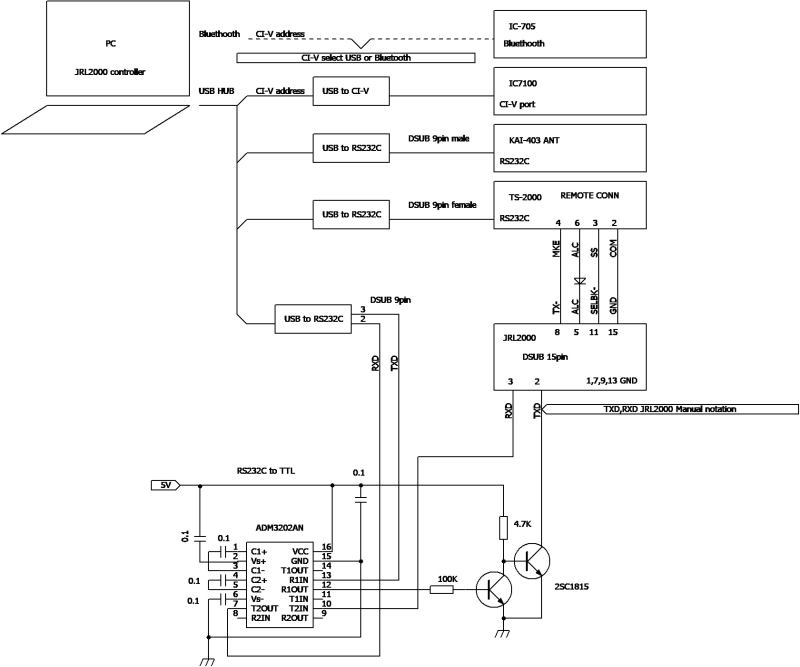
Hardware production is required. See circuit diagram
Install & Uninstall
Since it does not use the registry, uninstallation simply involves deleting
the files.
Please note that the use of the program is at your own risk and responsibility.
start up
Double-click on the 'jrl2000f_controller.exe' file.
Setting
Right-click an empty area of the panel, not the title at the top.
A menu will appear.
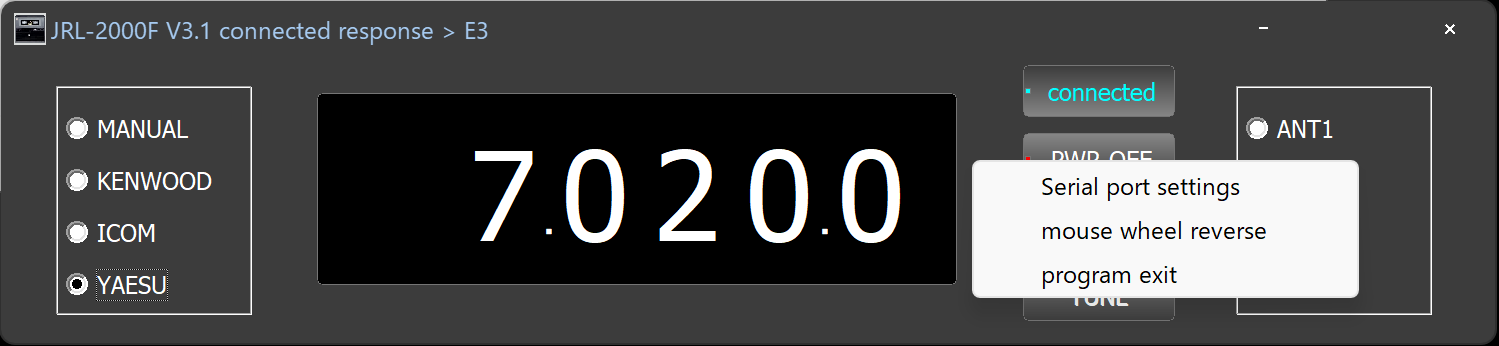
Serial Port Setting
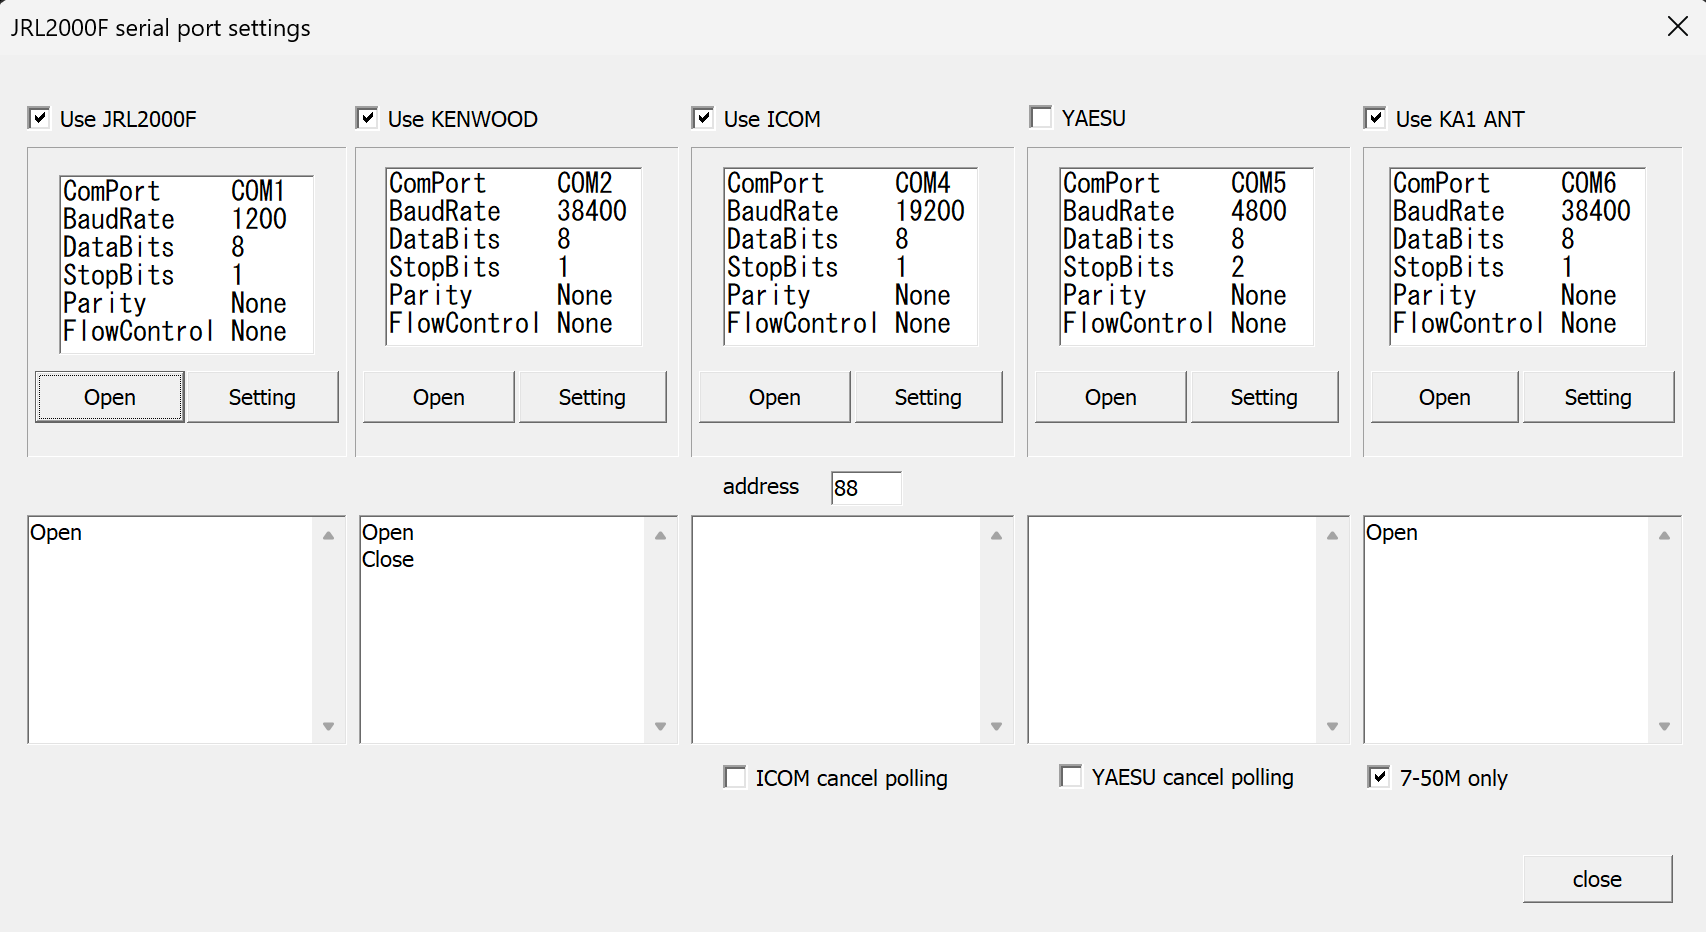
Use JRL2000F as is.
Configure settings to match the Kenwood radio.
Send an IF command.
When using an ICOM radio, enter the address of the transceiver to be used.
When CI-V output (for antenna) is turned on, frequency information will be automatically output when the transceiver frequency is changed,
so please check "Cancel ICOM polling".
If you want to connect with IC-705, use Bluetooth.
Pairing with your PC.
Please refer to the manual (for IC705, select pairing from the partner
station).
Once pairing is complete, click "More Bluetooth options" on the PC screen.
Select the "COM Port" tab.
It is OK if the outgoing ICOM BT (IC-705) 'SPP Dev' and the incoming ICOM
BT (IC-705) are displayed.
The outgoing COM port will be used.
Select the COM port of ICOM Enter A4 (default value, if you have changed
it) for the address.
Press the [Set] button to confirm.
On the main screen, select Manual and then select ICOM again.
Configure settings to match Yaesu radio.
Send an IF command.
If you are using a PC control program and should not send IF commands,
please check 'Yaesu cancel polling'.
Match the baud rate of KA1 ANT (SteppIR is also possible?).
Select [KWD/K2/K3_IF] (KENWOOD) for antenna control settings.
If you check 7-50M only, frequencies outside of that frequency range will
not be output.
During MANUAL operation, the frequency can be changed by turning the wheel
on the frequency display.
At this time, adjust the wheel movement and UP/DOWN direction to your liking.
Mouse wheel reverse
Reverses the frequency UP/DOWN direction.
The frequency is automatically read from the transceiver, but the display
only shows the range from 1MHz to 54MHz.
The frequency range of JRL2000F is limited to 1MHz to 30MHz, so when the frequency exceeds 30MHz,
the [PA] switch of JRL2000F will automatically turn off.
When the frequency becomes usable and you want to use JRL2000F, turn on
the [PA] switch manually.
The frequency and antenna switch status are stored inside the JRL2000F,
but there is no command to read the antenna status.
Therefore, the antenna setting information is memorized and set every 1 MHz.
Be sure to check your frequency and antenna settings.
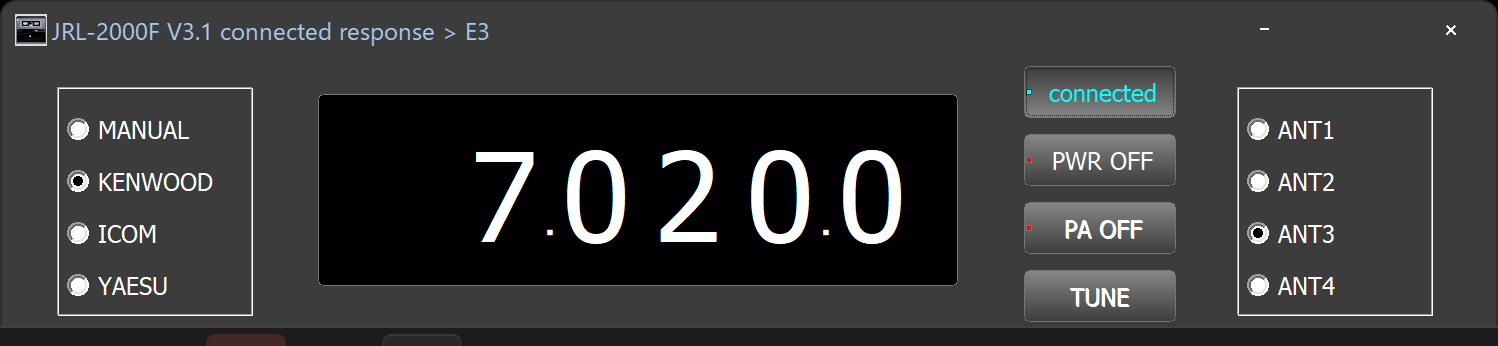
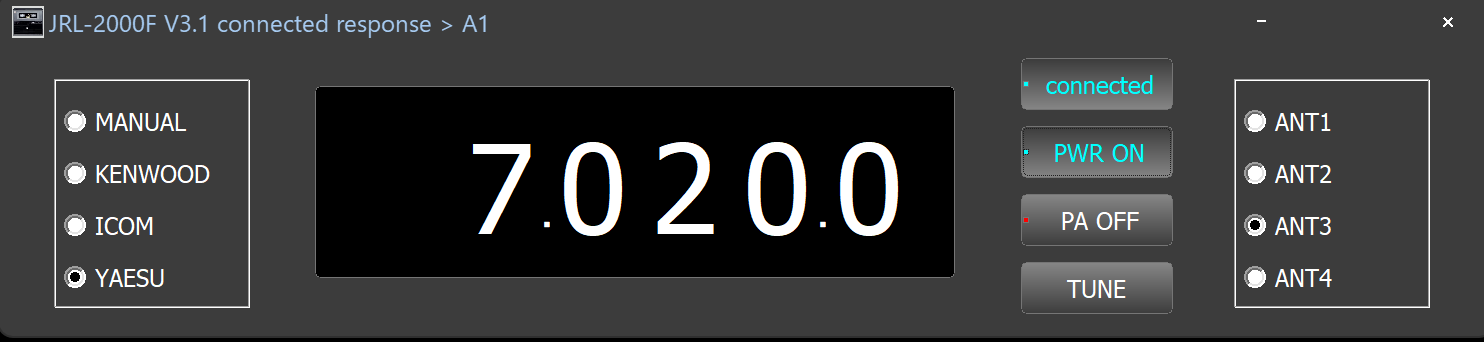
The connected image will look like this.
It is connected to JRL2000F and the power is on.
PA is set to OFF and ANT is set to number 3.
Since I started the program and pressed the [PWR OFF]
button, the JRL2000F turned on and responded "A1".
Therefore, the title is "JRL-2000F V3.1 connected response > A1".
[Download]
JRL-2000 Controller V3.1
Please email any questions to
ja7eif @ gmail.com'
Please remove any spaces before or after the email address.
Reference
JRL-2000F communication
1200bps 8bit non parity 1stop bit
COMMAND
Power Info 'C'
response 'A1' (Power ON)
'A0' (Power OFF)
Power ON/OFF 'A'
response 'A1' (Power ON)
'A0' (Power OFF)
PAスイッチ ON/OFF 'D'
response 'D1' (PA ON)
'D0' (PA OFF)
TUNE 'F2'
frequency binary 00 07 10 00 (7100.0KHz)
ANT1 'E1'
response 'E1'
ANT2 'E2'
response 'E2'
ANT3 'E3'
response 'E3'
ANT4 'E4'
response 'E4'
Delimiter CR
![]()